
Pediatric restorative dentistry tips
What follows is a brief overview of the Hall technique for stainless steel crowns and the Forte strip crown using glass ionomer on the anterior teeth.
The key to managing child patients is to do minimally invasive dental techniques. Doing so is going to help avoid traumatizing them and help maintain trust.
You don’t want to get a perfect stainless steel crown at the expense of creating a patient who’s fearful to come into the dentist for a lifetime.
Hall technique for stainless steel crowns
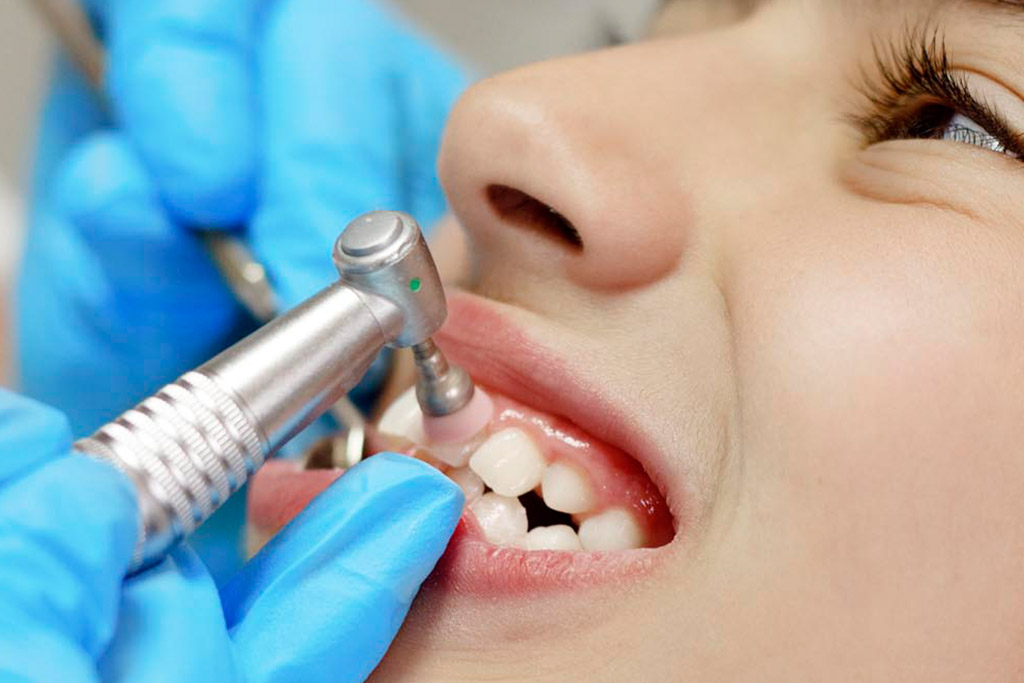
With the stainless steel crowns, for children you should use the Hall technique. The first appointment involves placing the SDF (silver diamine fluoride). This helps to kill decaycausing bacteria. Then wait one to two months to make sure the decay has been arrested.
If necessary, you may need to reapply the SDF another time. But once you’re sure the decay has been arrested and the tooth is still vital you can place a stainless steel crown without any tooth preparation.
If the occlusion is a little bit high from the stainless steel crown, you can just let it settle. However, if there not is enough interproximal space to place the stainless steel crown, you can try to flatten the interproximals of the crown with the Howe plier.
Or place an orthodontic spacer between the teeth for one to five days and then have the patient return.
Once that’s done cement the stainless steel crown with glass ionomer cement. The glass ionomer cement is moisture friendly. It’s fluoride releasing and by sealing this primary tooth with a stainless steel crown, the glass ionomer cement should starve any bacteria that’s in there.
This is, of course, as long as the tooth is vital. If it is you can use this to help maintain the space until the permanent tooth comes in. Which means you won’t need do a lot of pulpectomies.
Forte Strip Crown for anterior teeth
This technique uses plastic crown formers on the anterior baby teeth.
First, try on the plastic strip crown, get the right size and adjust the length by trimming the plastic to follow the gum level to make sure it fits.
Second, remove most of the decay with a slow-speed handpiece, which may not require anesthesia. Then place the conditioner that comes with the glass ionomer and put the glass ionomer in the plastic crown and put it on the tooth.
We know glass ionomer sets up over time, so you can leave the plastic crown former on the tooth up to a week to let the glass ionomer cement get harder.
The patient should come back a week later and then you can use an explorer to remove the clear plastic crown former and then adjust and polish the tooth as needed.
These two techniques are effective methods of doing an anterior strip crown and a stainless steel crown in the posterior with no anesthesia and minimal tooth preparation.
purchase lasuna online – diarex tablet himcolin drug
gabapentin over the counter – order sulfasalazine 500 mg sale azulfidine for sale
purchase besifloxacin without prescription – buy besivance generic sildamax online
buy benemid 500 mg online – etodolac oral carbamazepine 200mg brand
buy generic celebrex 100mg – purchase flavoxate generic order indomethacin pill
buy mebeverine 135 mg without prescription – arcoxia order cilostazol over the counter
purchase voltaren generic – order diclofenac 50mg pill cost aspirin 75mg
order mestinon 60 mg generic – pyridostigmine for sale imuran online buy
buy generic rumalaya over the counter – endep drug endep 50mg cheap
buy lioresal paypal – purchase piroxicam online cheap oral feldene
buy generic voveran over the counter – order voveran pills nimotop medication
brand cyproheptadine 4 mg – buy cyproheptadine 4 mg online cheap generic tizanidine 2mg
mobic 7.5mg price – rizatriptan cheap buy toradol
buy cefdinir no prescription – cleocin order online buy clindamycin generic
purchase artane generic – cheap trihexyphenidyl online how to order emulgel
buy deltasone 10mg without prescription – buy prednisone sale oral permethrin
isotretinoin 10mg canada – accutane medication oral deltasone 40mg
betamethasone 20gm usa – order benoquin sale monobenzone for sale online
acticin where to buy – acticin buy online tretinoin order online
metronidazole 200mg over the counter – metronidazole 200mg pills cenforce online buy
augmentin 1000mg for sale – cost levothroid generic synthroid
how to get hyzaar without a prescription – keflex 250mg drug buy keflex 125mg without prescription
buy cleocin pills for sale – how to get clindamycin without a prescription buy indocin online
provigil uk – cost provigil 200mg brand meloset
crotamiton online order – order eurax without prescription brand aczone
Теперь ставки на спорт доступны каждому — просто скачайте приложение БК и начните выигрывать
Установите 888Starz APK для удобного доступа к игре
oral zyban 150mg – zyban price buy shuddha guggulu
order capecitabine online – order naproxen 500mg pills danazol 100mg cost
Сокращайте затраты на перевозку, выбрав попутный груз для своего маршрута
Для удобной игры скачайте 888starz apk ios
Hi friends, its fantastic piece of writing on the topic of cultureand
entirely explained, keep it up all the time.
Feel free to surf to my web site webpage
Методы накрутки ПФ помогают увеличить заинтересованность пользователей и привлекать аудиторию.
buy generic prometrium – clomid 100mg usa purchase clomiphene without prescription
cost fosamax 35mg – purchase pilex pill order provera 10mg online cheap
Ищете надёжный грузоперевозки чат? Мы предложим выгодные условия для отправки.
I am not sure I can comment on those particular ones since they do have the red clover in them priligy tablets online Brian RnISNYFofeQznxCyN 6 26 2022
norethindrone 5 mg sale – buy norethindrone medication purchase yasmin
Для доступа к казино скачайте 1xslots apk и наслаждайтесь игрой в слоты.
Lucky Jet демо счет позволяет изучить стратегию и выбрать момент для ставки.
purchase estradiol sale – arimidex usa buy anastrozole 1mg pills
Легальные букмекерские конторы предлагают удобные мобильные приложения для ставок на спорт — скачайте БК на Android
Access top betting games on 888Starz Pakistan and maximize your chances.
гѓ—гѓ¬гѓ‰гѓ‹гѓі е‰ЇдЅњз”Ё – г‚ёг‚№гѓгѓћгѓѓг‚Ї еЂ¤ж®µ г‚ёг‚№гѓгѓћгѓѓг‚ЇйЊ 500mg еј·гЃ•
Descubre el emocionante mundo de 1xslots online casino y disfruta de premios.
Descarga 1xslots download ios y juega en tu dispositivo iOS sin limites.
バイアグラ еЂ¤ж®µ – シアリスジェネリック йЂљиІ© г‚їгѓЂгѓ©гѓ•г‚Јгѓ«гЃ®иіје…Ґ